Code Linting for Web Designers
TL;DR: You may have heard that you should be “linting” your code. What does that mean? Why would you want to do it?

What are linters?
Similar to how Kleenex became the generic term for facial tissue and Xerox became the generic term for photocopies, Lint is a generic term that started from a specific one. The original Lint was a Unix utility to check C code for problems.
The term “lint” was derived from the name of the tiny bits of fiber and fluff shed by clothing, as the command should act like a dryer machine lint trap, detecting small errors with big effects.
Today, we use the term “linters” for a class of tools that check code for common bugs and stylistic errors. Most linters are highly configurable so they can enforce the standards of your organization.
Why should I use a linter?
There are two main reasons to use a linter: To save yourself trouble by avoiding common problems and to enforce a common code style across a team.
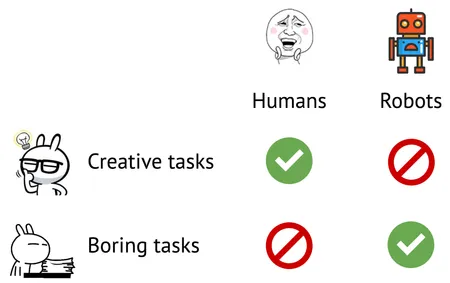
Everyone makes mistakes when they’re coding. It’s easy to use the wrong type of bracket, forget a semicolon, or misspell something. Checking your code for these types of errors is the kind of thing that computers excel at. Rather than reviewing your code line by line for common syntax errors, you can tell a computer what types of errors to look for.

Image credit: Robots Must Suffer by Andrey Sitnik
Another great use of linters is to help every member of your team write code in the same style. The inconsistency that results when one team member indents with tabs and another with spaces, or when one person sorts CSS rules by type and another alphabetically, can be very frustrating.
Try this instead: When you encounter a situation like that, have a discussion with your team, pick a standard, and then let the linter enforce it. No longer do you have to leave code review feedback reminding a team member to follow the standards, or deal with someone reformatting your code. Let the computer be the enforcer!
At Cloud Four we use linters for JavaScript and CSS. The linters are configured to enforce best practices and coding conventions that our team has agreed to follow. For example, in CSS, the linter keeps our rules sorted alphabetically and enforces our class naming convention. In JavaScript, the linter applies a maximum line length and encourages the use of the JSDoc commenting standard.
What linters should I use?
There are a lot of linters out there, and which ones are most useful to you will depend on your stack. That said, for most front-end development projects, I recommend using Stylelint for CSS, ESLint for JavaScript, and Prettier for formatting.
ESLint
There have been several popular JavaScript linters over the years, but ESLint is arguably the most popular right now. ESLint places a particular emphasis on extensibility, with a very active community of plugins, modules, and shared configs. Some popular plugins are eslint-plugin-unicorn, which is an opinionated collection of JS formatting rules, and eslint-plugin-jsdoc, which ensures your JSDoc comments are constructed properly.
Stylelint
Stylelint is the most popular linter for CSS (and alternate syntaxes like Sass and Less). It can even be used to lint CSS in other files, like script elements in HTML, Vue single-file components, and CSS-in-JS. It’s modeled heavily on ESLint, following the extensible model. That means it’s easy for the community to add lint rules for things they care about, such as ordering CSS rules, enforcing BEM naming style, or Sass-specific syntax.
Prettier
Prettier is interesting because while other linters focus mostly on preventing errors and enforcing best practices, Prettier only cares about code formatting: How to indent your code, how long your lines are, etc. Unlike Stylelint and ESLint, which are extremely configurable, Prettier bills itself as opinionated. You can override some default settings, but the intention is to add Prettier and accept the defaults in most cases.
If you’ve ever been in an argument about whether to indent with tabs or spaces, you’ll understand the value of having a tool that removes the debate. At first, I found some of the decisions Prettier made frustrating. Over time, I’ve come to find it invaluable that neither I nor my team need to think about line lengths, trailing commas, or spaces around brackets anymore.
Prettier started with a focus on JavaScript, but it has added support for many other languages, including CSS, HTML, and Markdown.
Other linters
There are many other linters out there. No matter what language you’re using, a linter certainly exists for it, from Remark for Markdown to RuboCop for Ruby. If you use GitHub, you can even add the GitHub Super Linter, a GitHub Action that will run just about every linter imaginable automatically based on your file types.
How do I use a linter?
There are several options, depending on how much control you have over your development environment and build tools.
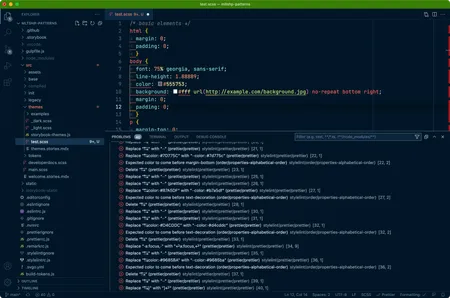
At the most basic level, you can install a linter into your editor. Most linters have plugins for VS Code and other editors. By installing the plugin, your editor will know to read your config file and will highlight lint errors directly in your editor. If you add a lint config file to your project, then anyone with the linter installed in their editor will benefit from the shared set of rules.

The next level involves installing the linter directly in your project. Explaining how to install and configure specific linters is beyond the scope of this article. For more details, see the installation instructions for the particular linter you want to use.
If you’re using Node, then after you’ve installed the linter in your project, you can add a script in your package.json file that will allow anyone using the project to run the linter. For example, we’ve added a lint script to all our projects so any contributor can check their code just by running npm run lint from the command line. It will let you know if your code matches the lint rules, fix problems it knows how to fix, and show an error for the ones it can’t.
Finally, you can add the linter as an automated step of your workflow. If you already have a CI step, you’ll want to add it there. For example, in most of our projects, we have added a GitHub Action to run the linters whenever a PR is opened.
What rules should my linter enforce?
This will vary from project to project, but it’s a great idea to start from a sensible set of defaults. Most linter projects provide a recommended configuration file to enable rules that fix common problems. Stylelint has stylelint-config-recommended, and ESLint has eslint:recommended. You can override any of those rules you don’t like, and add any additional rules you might want.
Beyond the recommended configs, most linters have one or two community shared configs that are incredibly popular. A good example of this is AirBnB’s ESLint config. These are very opinionated, but if you’re starting from scratch, or your team doesn’t have any defined standards, it can be a great way to get started.
Ignoring rules
No matter how well-intentioned the rules, there will come a moment where you need to tell the linter to ignore some code. Maybe Prettier’s formatting for a block of CSS is harder to read than what you had. Perhaps an ESLint rule is overly strict for some prototype code. Regardless of the situation, you’ll want to know how to disable the linter for a particular line or file.
Most linters will allow you to set up an “ignore” file that tells the linter not to pay attention to certain files. For example, we usually add the entire “prototypes” directory to Stylelint’s ignore file, because prototype code is meant to be quick and dirty.
Linters will also usually include a special comment you can add to disable the linter for the next line or section of code. The syntax will vary from linter to linter, but it usually looks something like this:
/* stylelint-disable-next-line declaration-no-important */
display: none !important;
That comment tells Stylelint to disable the “No !important” rule on the next line.
Conclusion
A few years ago, I was working as a CSS developer, and at the time I never considered that linters might be useful to me. I knew my programmer coworkers used linters, but it didn’t seem relevant to HTML and CSS. What opened my eyes was reading Lint your CSS with Stylelint on CSS-Tricks. It introduced me to the concept of letting a computer do the boring work of enforcing standards and avoiding syntax problems. I created a Stylelint config for my team, and I’ve never looked back. Nowadays, I can’t imagine doing my job without a good linter backing me up.